CFEngine Build
Now that you’ve installed CFEngine, and used the Web UI a bit, let’s take a look at extending it with modules. CFEngine Build enables users to find useful modules on the website, build.cfengine.com, and easily add them to their policy.
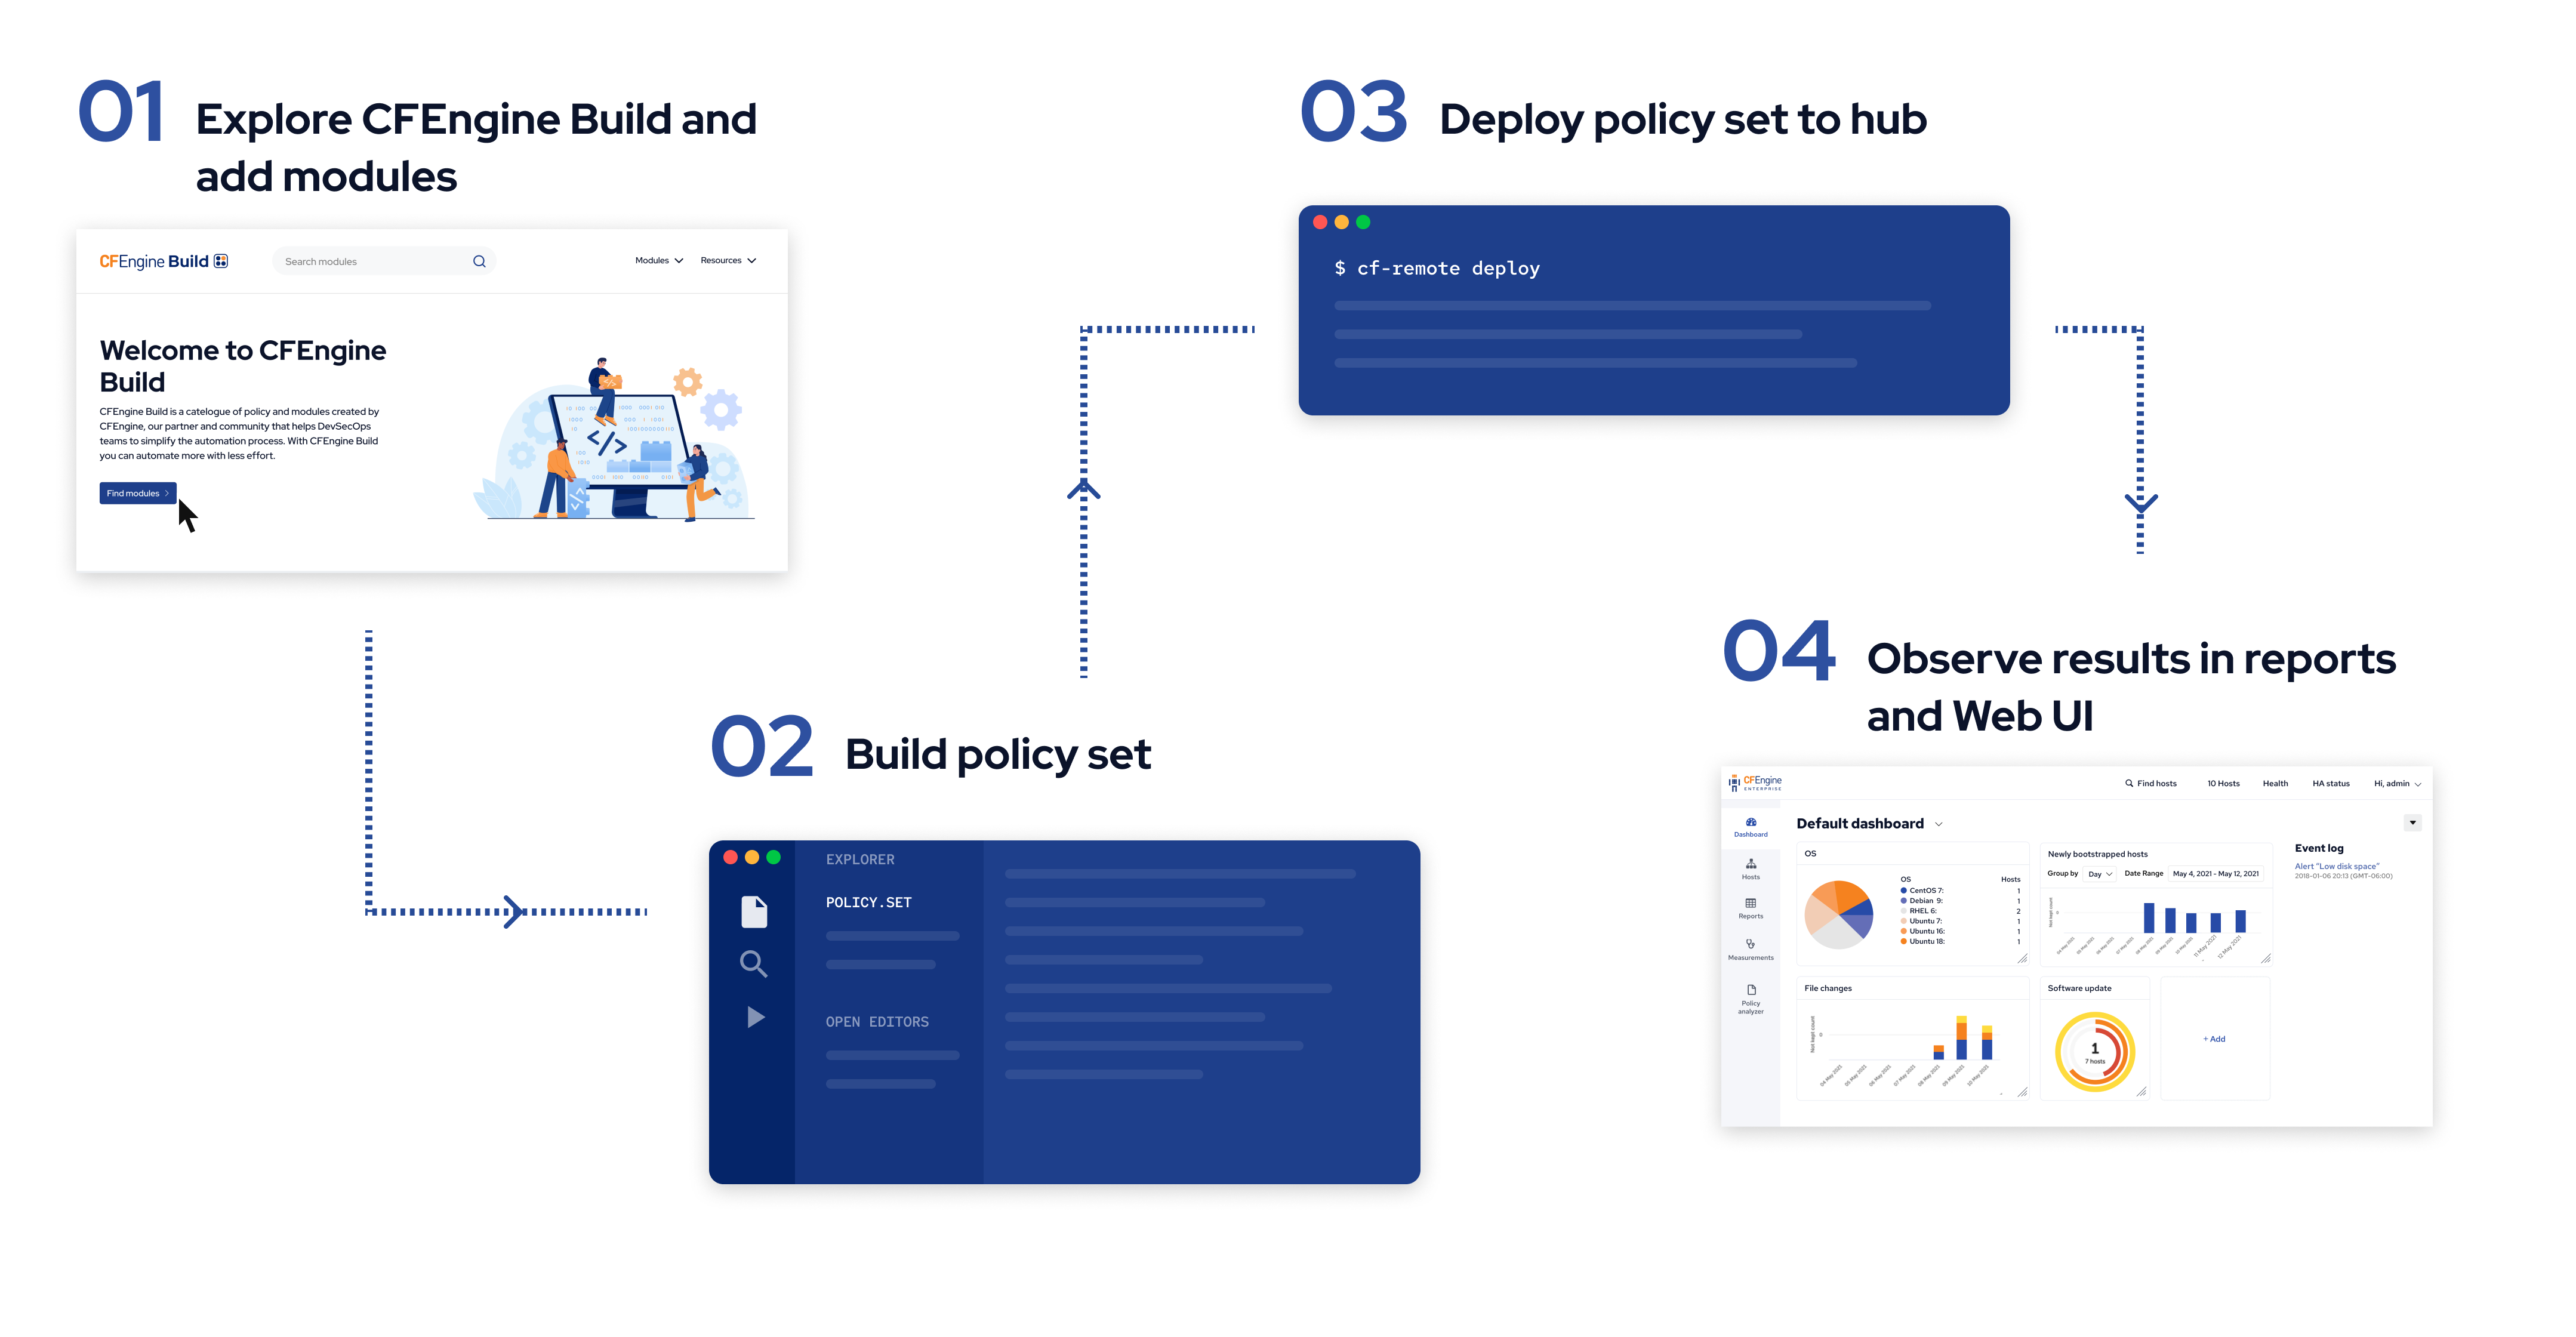
The workflow will look like this:
You can work on CFEngine Build projects both from inside Mission Portal, and using our command line tools. In this tutorial, we will do it from inside Mission Portal.
Step 0: Creating a new project
Step 1: Explore and add modules
Step 2 & 3: Build & deploy
Step 4: Observe
Open your web browser and enter the IP address of your hub in the address bar to go to the Mission Portal web UI. For example:
https://192.168.56.2/
(Log in with username admin and password admin, or whatever you changed it to when you first logged into your hub).
By clicking on Reports and Compliance we can see the report we added, OS is vendor supported:
(It may take a few minutes before the report shows up).
What’s next
This marks the end of the getting started tutorial. You now have a good foundation to start using CFEngine, finding modules, exploring the Mission Portal web UI, and so on. If you want to follow some more advanced tutorials, here are some that might be interesting to you:
 Chat
Chat Ask a question on Github
 Mailing list